A Guide to LED Strip Installation
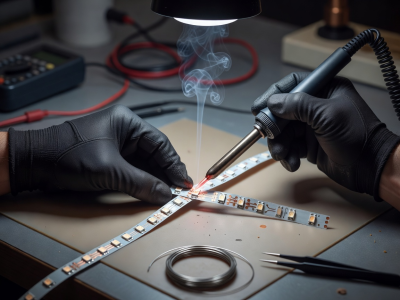
While installing standard LED bulbs requires merely twisting them into a socket, deploying low-voltage flexible LED strips involves a degree of planning. Custom installations for under-cabinet lighting, cove lighting, or architectural outlines demand correct power calculations, cutting techniques, and proper diffusion to achieve a professional result.
1. Planning and Measuring
Before purchasing hardware, measure the exact length of the runs required. Standard LED strips are sold in reels (often 5 meters or 16.4 feet). It is highly recommended to diagram your layout, noting where power outlets are located and where controllers will be mounted.
2. Cutting and Connecting
LED strips are built on continuous flexible printed circuit boards. They cannot be cut arbitrarily. You must only cut along the designated cut lines, which are typically marked with a scissor icon and feature exposed copper pads. Cutting anywhere else breaks the circuit for that entire segment.
Joining Segments:
- Solderless Clips: The easiest method for beginners. You slip the stripped end into a plastic clip and snap it shut. However, they can be prone to connection issues over time if jostled or exposed to vibration.
- Soldering: The professional standard. Stripping the conformal coating (if waterproof) and applying a small bead of solder to join wires directly to the copper pads ensures a robust, permanent electrical connection.
3. Sizing the Power Supply
Unlike standard fixtures, most raw LED strips require low DC voltage (typically 12V or 24V). Attempting to wire them directly to mains power will result in immediate destruction. You must use a dedicated driver or power supply.
To calculate the required size of the power supply:
- Find the wattage per meter (or foot) of your selected strip.
- Multiply that by the total length of your run.
- Add a 20% safety buffer. This prevents the power supply from constantly operating at maximum load, vastly extending its lifespan.
Example: A 5-meter strip requiring 10 watts per meter consumes 50 watts. Add 20% (10 watts). You should purchase a power supply rated for at least 60 watts.
4. Combating Voltage Drop
Direct current traveling across the thin copper traces of an LED strip experiences resistance. If you run a strip too long (e.g., trying to run 15 meters continuously from one 12V source), the LEDs at the end of the run will appear dim or yellowish. This is voltage drop.
To solve this, limit continuous runs to the manufacturer's recommended maximum (often 5m for 12V strips, 10m for 24V strips). For longer installations, you must run a parallel power wire alongside the strip and "inject" power at regular intervals, or power the strip from both ends simultaneously.
5. Mounting and Diffusion
While LED strips have adhesive backing, mounting them bare often results in two problems:
- The "Dot" Effect: Bare LEDs reflect off glossy surfaces (like granite countertops or polished floors) as distinct, harsh dots of light.
- Thermal Failure: High-density strips generate heat that the adhesive backing alone cannot dissipate.
The solution is an aluminum extrusion profile (often called a channel). The aluminum acts as a heat sink, drawing heat away from the diodes. Furthermore, these channels accept snap-in frosted plastic diffusers, which blur the light into a continuous, smooth, neon-like line.